After almost two straight weeks of rain, spring has come early here. The inch-thick mud dried out in the sun, and the yard outside of my apartment building has once again been made suitable for impromptu canine play sessions — and for dog photography.
Gunner is 3 years old, with the mindset, attitude, and energy levels of a 5-month-old pup. He and Rufus have been friends for quite some time. They share a love of wildly physical play-fighting and of fetching sticks, though they'll both get growly and protective of a stick that's already in their mouths.
If you close your eyes as Gunner gallops past you, you'd swear from the intense thudding of his paws that someone was riding a horse nearby. And no, I'm not exaggerating. He's a LOT of dog.
The moment I pulled out my camera, Gunner stopped running in circles and came right toward me to sit down and pose. I love a dog who loves the camera.
Friday, March 19, 2010
Return of the Friday Dogs: Gunner
Posted by Oz at 1:12 PM 15 comments
Labels: dogs
Friday, March 12, 2010
Tutorial: Make your own stencils
Right. So, I've been promising a tutorial for a while now. This one provides maximum satisfaction for minimal dificulty.
Supplies:
• a stencil-worthy design
• clear (or somewhat low-opacity) plastic sheeting
• cutting board or mat
• x-acto knife
• permanent marker
• ruler (optional)
Step 1: Make (or find) an awesome design.
Keep in mind the basic tenets of stencil-making — balance of positive and negative space, avoiding design elements that are so narrow or fussy the paint won't be able to get through, and being careful not to cut away so much that the physical structure of the stencil itself is compromised.
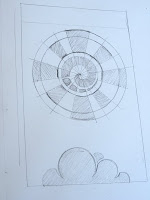
I'm going with a super-simple sunshine, because I'm tired of gloomy wintertime. You can see how sloppy the initial sketch is, but that doesn't matter much, as long as it's easy to tell what my final outlines are going to be.
Step 2: Trace the design onto the plastic.
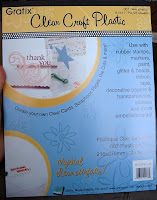
This is the plastic that I make all my stencils from. It's as clear as the transparencies they used to use on overhead projectors in school, but it's quite a bit thicker, so it'll be sturdy. I got this 25-sheet pack for about $4 at Michael's.
Usually I'll scotch-tape the plastic down onto my sketchbook to hold it steady while I trace it. Sometimes, though, I use a digital design I made on the computer, so I hold the sheet up against my monitor and (very carefully) trace it straight off of there. 
I usually also take the time to fully color in the bits I'm going to be cutting away; you'd be surprised how easy it is to accidentally cut out the wrong piece and ruin the whole thing. Plus, the sweet coloring sensation is very therapeutic for one's inner child.
Step 3: Cut it out! 
This is the time-consuming part — especially if you're like me and haven't changed the blade on your X-acto in about three years.
Even if your knife is as sharp as the Vorpal Sword, getting through that plastic can blister your fingers. Here are some tips to make it less painful:
• Cut it one half at a time. Score the plastic on the front side, then flip the stencil over and score it again on the back. At this point your blade should readily slice all the way through. This way is easier than trying to force the knife all the way through on the first go, which is bad for your knife, bad for your fingerpads, and bad for your stencil since it increases the chances of accidentally tearing the plastic.
Front side cut; ready to cut back side. --->
• Cut the smaller shapes out first. Every piece you cut out weakens the stencil overall and increases the risk of tearing the plastic; take care of the tiny, fussy shapes first, while they still have the full support of the unbroken sheet.
• Use a ruler for straight lines. This may seem like a no-brainer, but it makes enough of a difference that I feel it's important to mention.
• If you have some really big bits to cut out, you can use scissors. They're a lot faster, but they also make it much easier to stretch, warp, or rip the plastic. Use scissors with narrow blades, like those designed for cutting hair, if possible. I also strongly suggest making a pilot hole with a knife before you use scissors.
• Be careful and go slowly.
Step 4: Finishing

Trim the margins of your stencil if desired. Remember that it's a good idea to leave a little more extra plastic around the edges than seems necessary. This helps prevent spillover paint from getting on your substrate (the thing you're stenciling) where you don't want it.
As you can see in this picture and the one previous, the plastic tends to warp around the edges of the cuts, from the friction of the knife. I STRONGLY recommend flattening your new stencil out before using it — I usually just lay my Webster's on top of it for 15 minutes to an hour, which seems to work just fine.
Extra Tips
• Use spraypaint outside.
• If, like me, you roll on your paint with a roller brush, thin layers of paint work much better than thick ones, which can seep under the stencil and botch up your nice crisp lines. • Always wash a stencil after using it. Paint buildup can flake off when you least want it to and ruin your latest project.
• Store stencils flat. I keep mine in a folder, but laying them flat on a shelf will work just as well.
• Take care when storing stencils (or taking them out of storage) that they don't snag on each other. Ripping a stencil isn't fun, and simultaneously ripping two or more SUCKS.
• Don't stencil something that isn't yours unless you get the owner's permission. ;)
Posted by Oz at 12:57 PM 27 comments
Sunday, March 7, 2010
Pushing paint

I've been playing around with paint for the past couple of weeks. Obviously I've still got a long way to go when it comes to traditional materials, but the tactile experience of using actual brushes instead of digital brushes is just so delicious. I've been seriously spoiled by the "Undo" button. You can't Ctrl+Z your way out of a bad brush stroke.
Posted by Oz at 5:38 PM 0 comments
Friday, March 5, 2010
Free simple desktop wallpaper
I paid a visit to the unspeakably awesome Simple Desktops and got inspired. You should check them out. (Found via How About Orange.)
Posted by Oz at 5:34 PM 29 comments
Friday, February 19, 2010
Friday dogs: Jude


Jude has two mommies, both of whom are good friends of mine. He likes quiet dinners and long walks on the beach.
He's only 2 weeks older than Rufus, and they grew up together. They're desperately in love, but are doomed to remain apart — partly because they now live in different states, and partly because they're both neutered.
Posted by Oz at 2:31 PM 2 comments
Labels: dogs
Thursday, February 18, 2010
Tuesday, February 16, 2010
Friday, February 12, 2010
Sign of the Bull

I did this one in about an hour. All I knew was that I was feeling very, very RED (a rare color in my usual palette) and impressionistic. I think the masculine bovine just came from my association between the color red and bulls — and no, not because of the matador and his iconic red flag, but because of the Red Bull that features in the book/film The Last Unicorn.
I'm also a Taurus, and my Chinese zodiac sign is the Ox. So it's appropriate.
I'm out of town this weekend; expect photos upon my return.
Posted by Oz at 12:29 PM 0 comments
Labels: art
Tuesday, February 2, 2010
Happy Groundhog Day!
Happy Groundhog Day, ya'll! Though if you want to know the truth, the famous rodent's forecast has less to do with whether or not he sees his shadow, and more to do with whether or not the coffee is ready.
Posted by Oz at 2:47 PM 0 comments
Labels: art
Saturday, January 30, 2010
Creative process

Look forward to seeing some spiffy new stenciled designs that will soon be gracing the journals/sketchbooks in my Etsy store.
In the meantime, you should check out the Stencil Revolution boards for some of the most astonishing stencil talent I've ever seen on the web — and for pure inspiration, go drool over the legendary Banksy.
Posted by Oz at 2:37 PM 0 comments
Labels: general
Friday, January 29, 2010
Friday Dogs: Nose
Posted by Oz at 3:55 PM 0 comments
Labels: dogs
Sunday, January 17, 2010
Put the fun between your legs.

A little design I did for the hell of it. I tried to think of a more original phrase to put at the bottom, but in the end, it was 3-something in the morning and I just wanted to go to bed.
Please do not claim, alter, distribute, etc. Click for full size.
Posted by Oz at 1:02 PM 0 comments
Friday, January 15, 2010
Friday dogs: Scoops
Scoops (also called Snookums, Scooper Dooper, and Poop Scoop) is a bichon frise, owned and very much doted on by my former coworker Karen Hollish. She named him Scoops as a cutesy homage to her career in journalism — as in, "What's the scoop?"
Posted by Oz at 3:47 AM 0 comments
Labels: dogs
Thursday, January 14, 2010
'Avatar' pwns
I had some fun with photo manipulation after seeing this video. This is me, as a resident of Pandora, a Na'vi:
It was surprisingly easy to do, and only took about an hour and a half, most of which I spent fiddling around with layer settings and opacity. Of course, I also didn't go into as much detail as the guy did in the video, such as re-texturing the skin and whatnot. And my face is extraordinarily un-Na'vi-like. Still, I think it's a pretty good effect overall.
As for the film behind the species: I thoroughly enjoyed Avatar and have to recommend it, and not just because it's visually amazing. Yes, it's very predictable (especially if you've read Frank Herbert's Dune — the storyline is practically identical), but just because you see the events coming from a mile away doesn't mean that you don't care about the characters they happen to. I cried more than once while I was watching it.
Posted by Oz at 4:17 PM 0 comments
Labels: art
Miraculous
I did most of this picture back in 2007, when I had a psychiatrist who was absolutely pill-happy. Every time I tried to come back to this piece to finish it, my .005 Micron would run out of ink, or I'd be unable to find that fine-tip paintbrush, or a friend would have to talk to me ohmygodrightnow, and then I'd just forget.
And now I've finally managed to finish the damn thing. And I am pleased. It was fun.
Posted by Oz at 3:37 PM 0 comments
Labels: art
Tuesday, January 12, 2010
Kiwi freebies
I have an ambition to make a latch-hook rug that looks like a slice of kiwi fruit. When I sat down to try to simplify the quintessential kiwi so I could work out a pattern, I got a little carried away and made it shiny.
Please enjoy the resulting desktop images. Click for full size.


Also, if you can find a use for the base kiwi image (PNG format), be my guest. I only ask that you give credit and refrain from selling the image (as stock or otherwise). 
Posted by Oz at 9:23 AM 0 comments
Sunday, January 10, 2010
Four Strong Legs

Also posted this to my DeviantArt account.
Reference photo from The Daily Coyote.
Posted by Oz at 3:17 PM 0 comments
Friday, January 8, 2010
Friday Dogs: Ghost Rufus

Posted by Oz at 9:32 PM 0 comments
Labels: rufus
Friday dogs: Katie
 Katie Biscuit, purebred golden retriever, born when I was in kindergarten, died while I was in college at the ripe age of 14. I literally grew up with her. She died old, overweight, mostly deaf, partially blind, and highly flatulent. Hobbies included lavishing affection on every human being within range, demolishing plastic children's toys, and chasing chipmunks (she actually caught one once, but didn't know what to do with it, and dropped it back to the ground, unharmed).
You have never met a dog so gentle.
Posted by Oz at 3:12 PM 0 comments
Labels: dogs
Friday, January 1, 2010
Boa tree
2009 was my first Christmas in my own home, as opposed to my parents' or Evan's parents' house. It was, therefore, my first Christmas without a tree. I'm not religious — I'm not even Christian — but having the holidays without a tree was not an idea I was too keen on. So I rigged up this little beauty using four zip ties, three coathangers, two feathered boas, and a partridge in a pear tree.
Tacky, but effective, and made with love.
Posted by Oz at 9:25 PM 0 comments
Labels: diy
Custom MLP: Kitsune
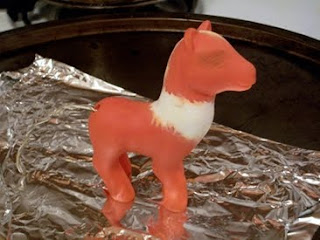
Kitsune is the fox formerly known as pony. It (I haven't decided if Kitsune should be male or female) was made from a pink fakie I found at Walgreen's and it's the size of a baby MLP. It features a re-angled neck, done with Sculpey — it was quite a revelation when I learned that you can bake a pony with no ill effects, though I wouldn't try it if the pony still has its hair (that stuff melts easily).
It also has a long, fluffy tail made from fake fur which was dyed by hand using a glorious technique elucidated by Beetlecat, here. The tail is attached with wire and is poseable.
The hair plugs along the back of the neck were plugged up with Sculpey as well, to give it a smoother look since I wasn't going to re-hair it. Then the pony was painted by hand with acrylics and given a matte sealant to prevent chipping/flaking. The fur was attached last.
Kitsune also features pink pawpads and white claws on all four feet:
It also has tiny black whisker-spots on its muzzle, like a canine, which you can see a little bit in this snap:
Kitsune has identical brand marks on both sides of its rump, like the old-school ponies had. The symbol is the kanji for fox. (I know, really original, amirite?)
The original plan:
And a progress picture I took right after baking. You can see the wire for the tail, which I had to insert before baking or painting since I wouldn't be able to get the pony's head off once that was done.
I haven't decided yet whether I'm willing to sell Kit. Leave a comment here or email me (summerdog.studio AT gmail) if you think you might be interested, and we'll talk.
Posted by Oz at 12:11 AM 0 comments
Labels: pwnies


